I’ve been using the Rocksmith Real Tone cable since I started playing Rocksmith 2014 a few years ago. Mostly, it’s okay, but sometimes it feels like it misses notes. I’m not the greatest player in the world by any means, so this is debatable, but as I get better I can see the flaws in its note detection.
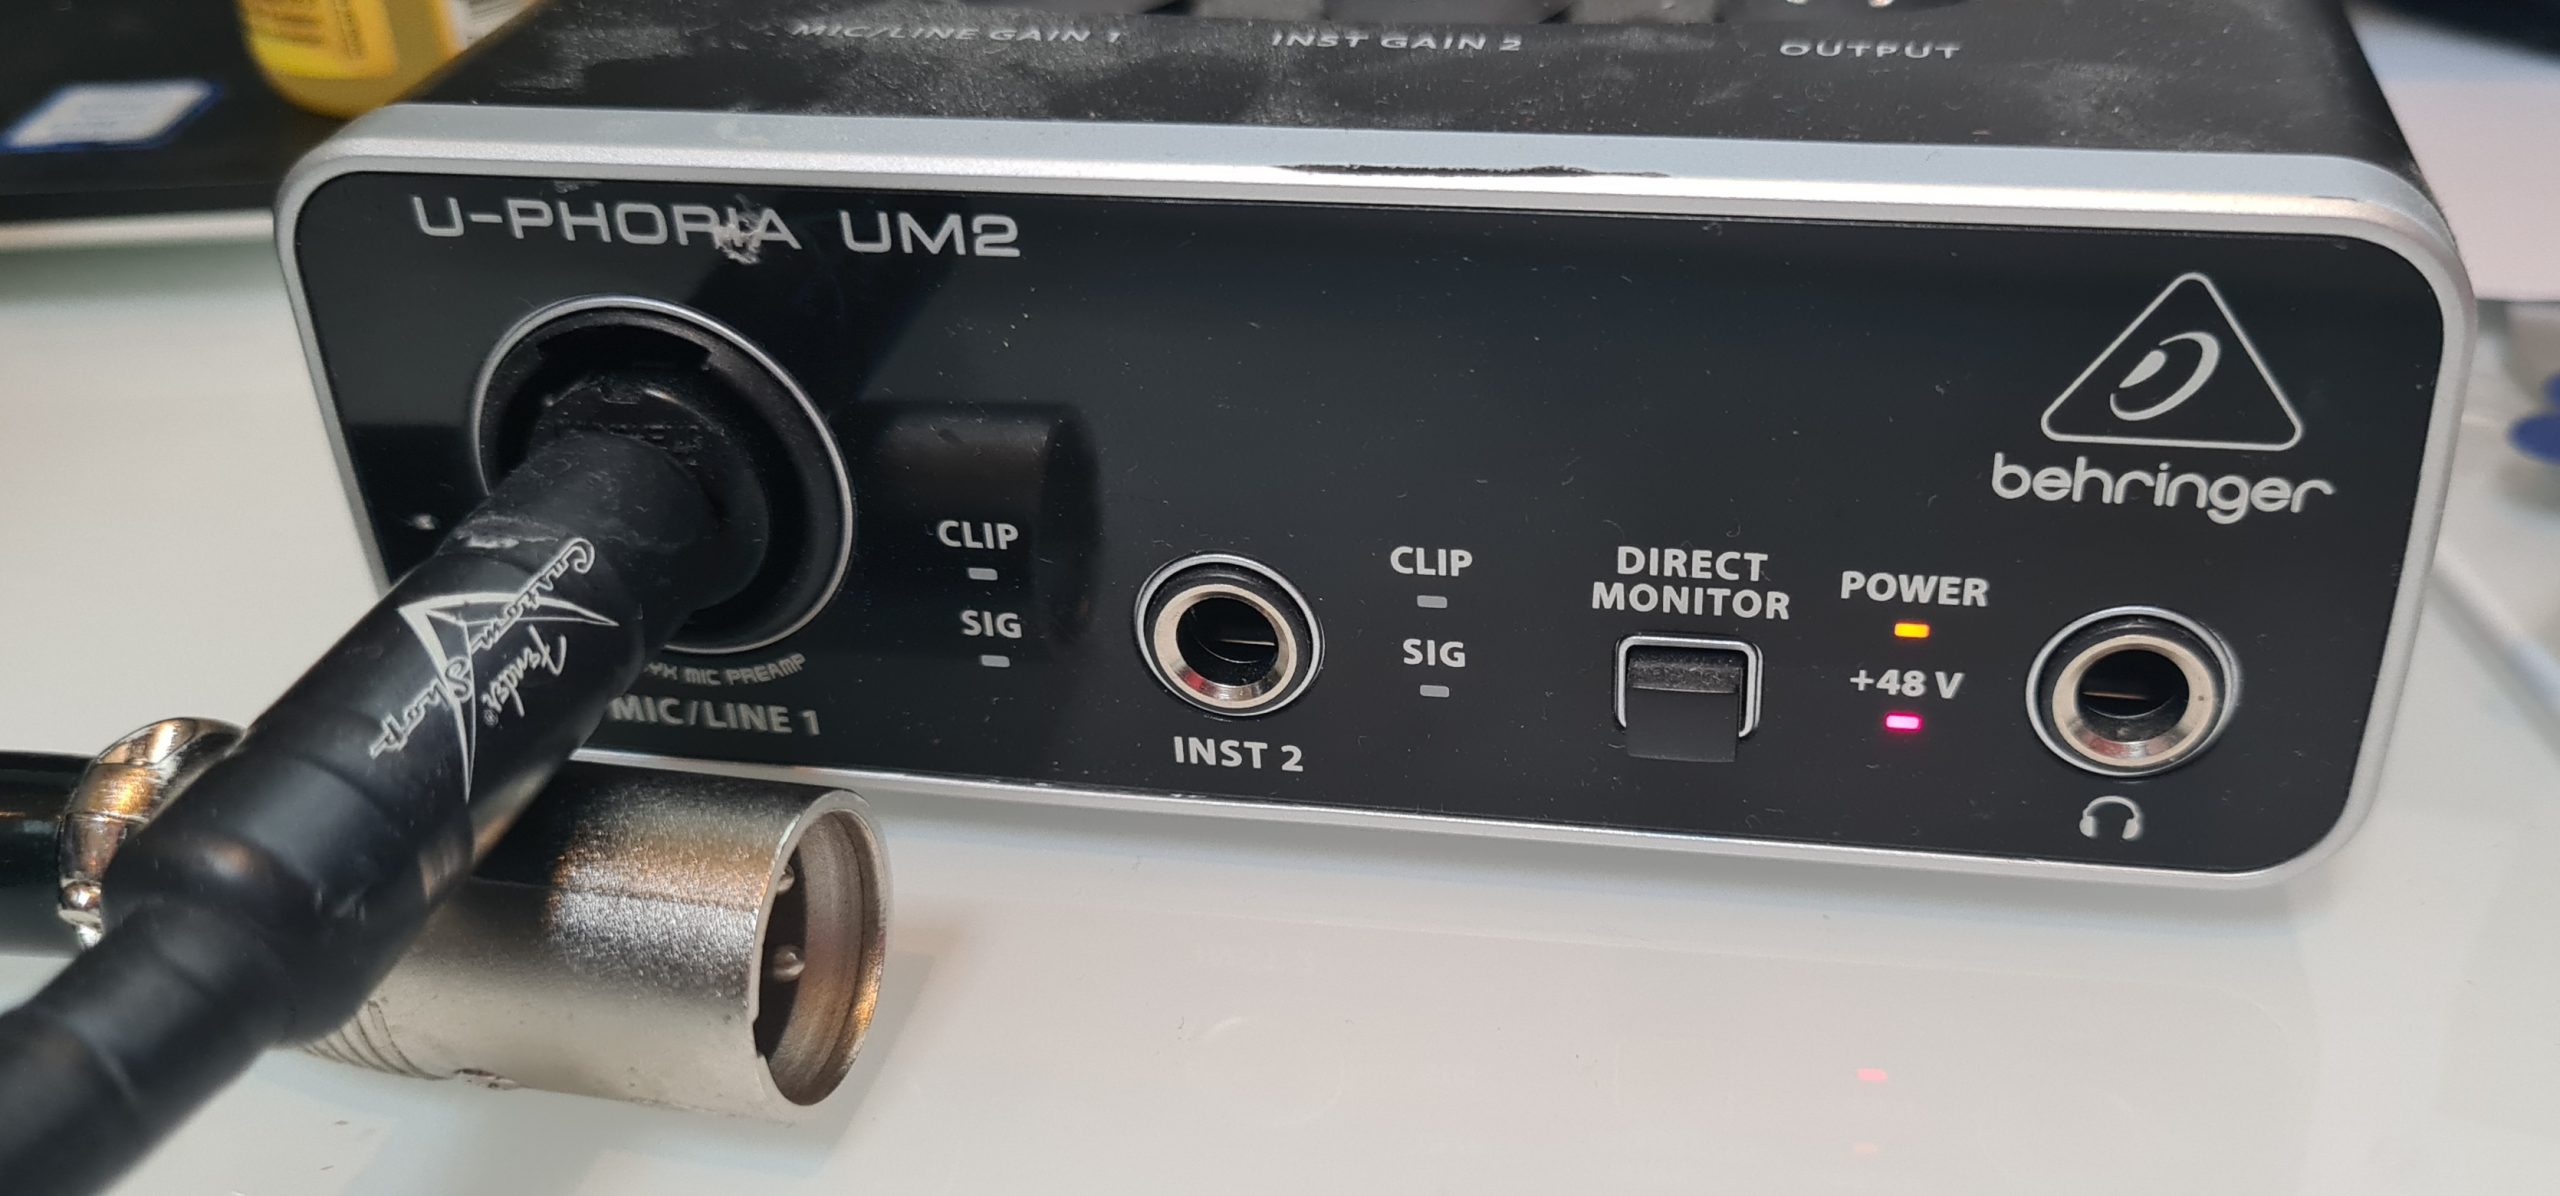
So, I decided to use a cheapish audio interface I had initially bought to test some microphones I acquired. The interface in question is the Behringer U-Phoria UM2. It has two inputs and (most importantly), a 48-kHz resolution, which is what is required by Rocksmith. Priced at just over £40, it does the job. Other interfaces are also available, such as the very popular Focusrite Scarlett.
Setting up the audio interface
There are some important things to take note of when using Rocksmith without the Real Tone cable. We’ve covered that the audio interface must be set to 48kHz already, but there are two other very important considerations.
Rocksmith will only use channel 1
If you have two inputs available on your audio interface, you must use the first channel. Which, usually, looks like it’ll only take a microphone input, but a standard guitar cable will actually fit!

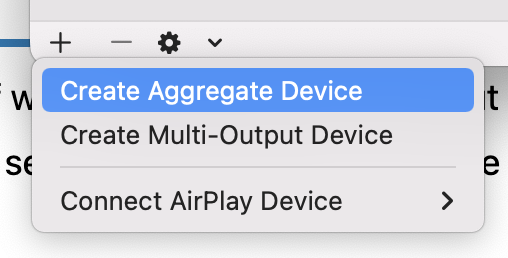
Creating the new device
You now need to create a new “aggregate” midi device.
On a Mac, go to the Spotlight Search and type in “midi”:

When the app opens, go to the bottom and click on the plus sign to add a new aggregate device:
Rename the aggregate device by clicking on the name:


Next, add your audio interface inputs and outputs to the aggregate device:
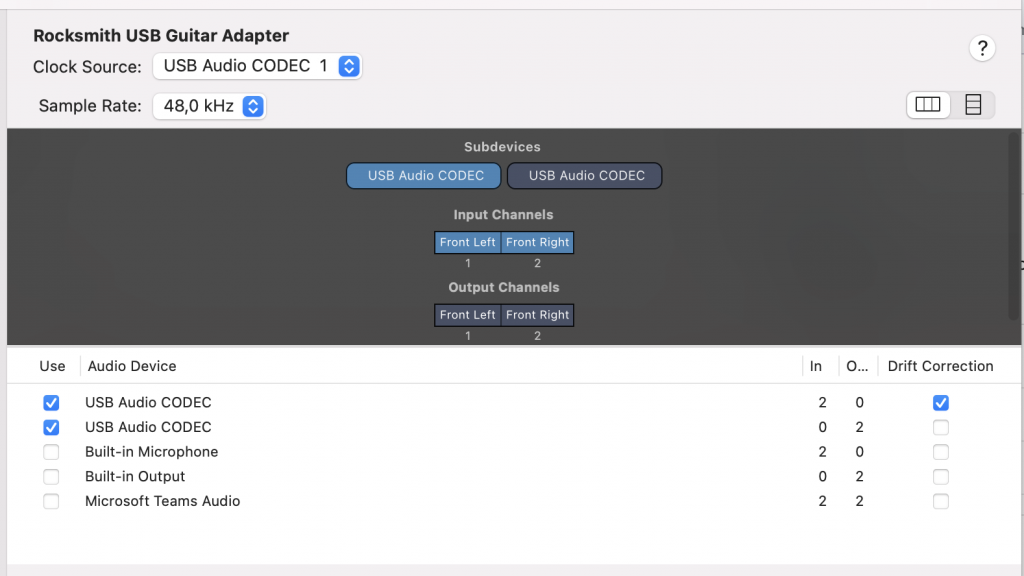
If you are unsure what-is-what on your system, then unplug the audio interface, see what disappears and plug it back in.
Now, launch Rocksmith and enjoy!